Wednesday, August 17, 2016

The CEDAR DNS 2 Portable Dialog Noise Suppressor --- The Sound Of Silence


There were a few “Wows!” and even a few fluttering hearts at NAB 2016 when Independent Audio debuted the new CEDAR DNS 2 portable dialog noise suppressor. It was followed by a stinging sensation as a result of the $4K USD price tag. CEDAR has the well-earned reputation for making expensive ($10K to $50K, USD) but effective audio restoration and forensic noise reduction software and hardware devices and winning awards for them since 1989. 

Fraser Jones and Independent Audio Staff
Fraser Jones, head of Independent Audio, a distribution company here in the USA, has always had a keen eye and ear for audio gear, (and recently some video gear) as demonstrated by the names on the Independent Audio line card; Audessence, Audio & Design, Audio Developments, Coles, DACS, Merging Technologies, Pearl, Sonifex and Thermionic Culture.  Not what you might consider mainstream, but slightly boutiquey. It was no surprise to see CEDAR on that list. 

Eric Toline
Professional Sound Services
A CEDAR DNS 2 was making its way back up the east coast from Eric Toline at the Fort Lauderdale office of Professional Sound Services to Independent Audio in Portland, Maine and landed here for a few days. I quickly put together an ad hoc gathering of Washington and Baltimore Location Sound pros; Bernie Ozol, Jim Gilchrist, Len Schmitz and Jonathan Cohen answered back quickly and the date was set. 

Len Schmitz
These are four top shelf mixers with many years of experience and incomparable ears. Some of us, myself included, had watched a YouTube video demonstrating the CEDAR DNS 2 and were concerned that either YouTube encoding had compromised the audio or that better adjustments on the mic or DNS 2 would yield better results.

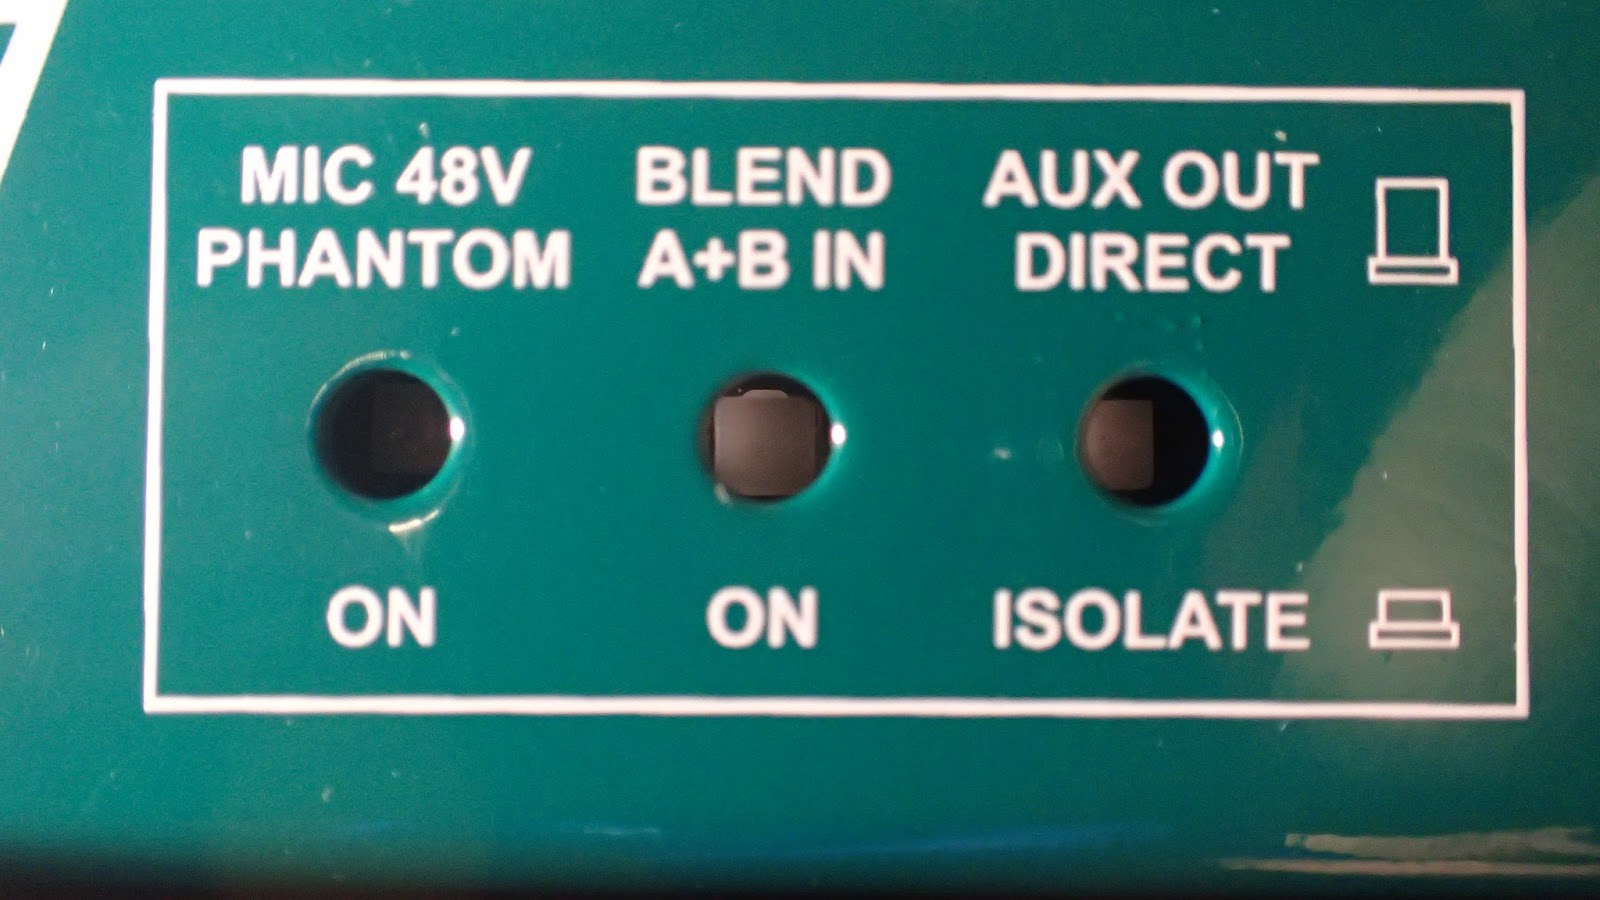
Bernie Ozol brought a 12 V DC battery, cup and female, four-pin XLR powering rig, so we wouldn’t be tethered by the wall wart that is included in the DNS 2. The two-channel DNS 2 has identical controls for each of its two channels.

Jim Gilchrist and Jonathan Cohen listen to playback.
The DNS 2 XLR inputs can be easily hard switched for Mic, Mic with 48 V Phantom Power or Line Level. The DNS 2 operates in 48 Khz, 24-bit mode, however, with external AES sync, it will lock to 44.1kHz, 48khz or 96khz, The DNS 2 also has an AES3/AES11 digital input and AES3 XLR connections.

Analog output from the DNS 2 via XLRs, is at line level only. That means the DNS 2 has a pair of preamps. Our first concern was the mic pres in the DNS 2. All five of us judged that the preamps were as good as the Sound Devices MixPre D we were using during these tests. Although we liked the sound of the preamps, we liked the idea of having a mixer for better control between the DNS 2 and the camera. Again, we’re location sound guys; of course we want more control. Several folks thought a headphone jack would have been nice, but we got along just fine with the headphone jack on the camera and on the MixPre D.

CEDAR DNS 2 Analog In and AES/EBU I/O
Gain range on the DNS 2 preamps is +18dB - +78dB. Dynamic range: >102dB (at 36dB gain). Each channel has its own independently switchable Phantom Power supply. The line input nominal level is +4dBu with 20dB headroom. 

Gain range is a very wide -6dB to +54dB with a dynamic range of > 102dB. The DNS 2 runs on 8VDC to 17.5V DC (nominal 12V) and consumes 4.0 to 6.0 watts. The DNS 2 is about the size of a Cracker Jacks box and weighs just over a pound. It has strap poles on the face that allow it to be  connected to other gear or a sound bag. 

CEDAR 4-pin XLR Power and Line Level Analog Output
TEST RANGE
Our first chain was CMC641>DNS 2>MixPre D>JVC HM650. We later went CMC641>MixPre D>DNS 2>JVC HM650 but heard no appreciable difference. 

The analog input level was already set very well for the Schoeps CMC641, so we didn’t have to touch that. The input sensitivity level can be easily adjusted by depressing the SetUp button and spinning the control knob.


CEDAR DNS 2 Front Panel
I live in Baltimore Country. An arc of the I-695 beltway semi-surrounds me from about a mile away. As a result, I can easily hear a constant low level pad of distant internal combustion machines. More locally, the cicadas were singing nicely the morning we did our tests. The Light Rail was running and we also had the occasional car-by and flights to and from BWI Airport. We also ran a test with an umbrella sprinkled by water from a hose while micing from below. 

The “Learn”  procedure is very simple. Hit the “Learn” button. It can be turned off or left on. We chose to leave it on most of the time. The Noise Reduction control is variable from 0 to -20. After SetUp and Learn, you simply engage the filter and use the rotary control to vary the amount of noise reduction.

I couldn’t find latency figures for the DNS 2, but Cedar’s DNS1500 sports a latency figure of Ten Samples; not milliseconds, but samples. My guess is that this short a latency figure is due to the zippy SHARC processors and Cedar’s algorithm. The DNS 2 is designed with 24-bit A/D and D/A conversion with 40 bit processing resolution and 1.2 GFlops (Floating Point Operations Per Second). That may not be a lot given where computer power has gone and continues to go these days, but it’s pretty damn fast. The result; a very powerful tool.

A Schoeps CMC641 with Schoeps B5D and Rode Dead Kitty was set on a locked down boom. We shot to SD cards in my JVC HM650 HD camcorder and did a few playbacks. We didn’t have enough headphone outputs to go around, so we share shared a pair of Sony MDR 7506 and Audio-Technica ATH-M50 as we shot and took the card down to my studio to listen for more detail over my Event Opal monitors.

Our first test was determining how much cicada noise we could reduce. Even before that, engaging the noise reduction dropped the distant mostly low frequency beltway noise right out. In most of our tests, the best results were when the noise reduction knob was midscale, somewhere between three and seven. Any more than seven and we could hear artifacts or the background would drop out so completely that the voice sounded like we were recording inside. That was eerie and surprising, At some point, when reduced to excess, the voice sounded like the person was talking through a tube.


While one of us was on-camera, talking for the test, the rest of us were making side comments off mic. Those comments were louder than the background noise, but not by much. As we increased the amount of noise reduction, those voices began sounding “watery.” If you were shooting a scene in a noisy location and wanted human “walla” in the background, this would be a problem. The “walla” didn’t sound right.

There was a general consensus among the five of us that use of any noise reduction required extremely astute listening. Astuteness that might not be easy on location and being close enough to the talent to have their voice “in air” adding to what we were hearing even with the closed back Sony and Audio-Technica headphones.

Jim Gilchrist came up with a good solution if you’re recording double sound. Use a spare track on your mixer/recorder and feed the noise reduced audio to that track and perhaps feed that to the camera as well. Also record a track without the noise reduction in case post has a problem with the processed track.

We all felt that putting both unprocessed and processed tracks on a camera was asking for trouble because of the opportunity for post to simply mix them together. That not only can happen, it has happened. If you’re doing all of the work yourself, then have at it!

Next was the “Umbrella Test.” Since it was not raining, I used a garden hose. We repositioned the boom to below the talent, aimed up at the umbrella. As such the CMC641 was hearing the talent and all of the umbrella above the talent’s head quite well. Again, we were all very impressed by how well the DNS 2 pulled the low frequency background noise as well as the voice out of the rain noise. And, again, moderate settings seemed the best. 


These two tests demonstrated the ability of the CEDAR DNS 2 to learn a fairly complex but consistent noise pattern and cancel it so well without the “underwater” artifacts most noise reduction devices create when pushed too far.

In some cases, when more Noise Reduction was applied, there was a spooky kind of feeling. We knew we were outside, but the audio was so quiet that it sounded as though we were inside. Just past that there was point there was a slightly phased “tubular” sound, as though the voice was speaking through a cardboard or plastic tube in between the voice and the microphone. 

Bernie Ozol (L) and Len Schmitz (R) set up an interior shot
Our indoor test was less dramatic. We set up in my living room, the room with the most echo in the house and positioned the mic first a proper distance and then purposely two feet away to get some room ring. While not a miracle worker, we were impressed by how much room the DNS 2 could wring out of the audio. I didn’t have time to test the DNS 2 in a really large hall to see how well it might extract large room sound.


Jonathan Cohen echoed Jim Gilchrists thoughts, "This gear raises the question of how much we, as sound mixers/recordists, should be effecting the audio we record. I broached this same question many years ago to a CAS forum; where do we draw the line on 'artistic license?' Is it our job simply to record the cleanest audio tracks possible and let Post do the boosting and cutting and effecting? Lastly, and I only thought about this today, I would like to have heard how it handled clothing noise on hidden lavs. Does this magic box work well on this too?"

As we wrapped, we talked about using the CEDAR DNS 2 on the set. At $4k USD, close to the price of one high-end wireless system, how would we charge a producer for that? If we brought it along and found it got us out of a jam, we could let the producer hear the before and after. If the producer approved the noise reduction, we thought a $100 USD charge would be nominal. Would they be prepared to pay the extra hundred? If so, it would take forty uses to pay for it. If the producer already had noise reduction capabilities in post, then he/she might not want us to use it in the field, for the extra cost and that we might use it too aggressively. Our final thought was that in the right hands and in the right situations, the CEDAR DNS 2 would be a winner, even if it was in post. In the wrong hands with the wrong ears, not so much.

Incidentally, there is an eight channel, CEDAR DNS 8. The DNS 8 was originally an AC powered device, but now also has four-pin,12 V DC powering. The DNS 8 costs $10K, USD.

CEDAR DNS 8 Live Hardware Dialogue Noise Suppression

Technique, Inc. © Copyright 2016 All Rights Reserved
More from Ty Ford at www.tyford.com


Monday, March 28, 2016

Audio Ltd. 1010 Digital Wireless Microphone


Audio Ltd. TX1010 xmitter
Some years back, as I was beginning to do more serious location audio work, I heard that Audio Ltd. made the best sounding analog wireless with the greatest range in the market; in particular their 2020 and then their 2040 series. I had been writing professional audio gear reviews for MIX, Radio World, Pro Audio Review, Pro Sound News and a few other trade magazines before the Internet caused the big trade magazine meltdown. What caused it? The immediacy of information and the loss of classified ads. I know, hard to believe, but those classified pages in the back of a magazine were solid gold. Anyway.......

I was very pleased by the 2040. Here's my 2040 review from back in 2007, they had the best sound and distance of any wireless I could find. Here are some 24-bit WAV files I recorded to a Sound Devices 744T.

The Audio Ltd. gear was not cheap; about $5K USD for a transmitter and receiver. They're made in the UK and had the reputation of needing a tweek now and then. That tweek usually meant a trip back to England; not all that convenient. By the time the Audio Ltd. slightly less expensive Envoy series was released they had redesigned the pieces so they could have circuit boards replaced here in the USA, and with minor adjustments, be returned to the owners a lot more quickly.


Audio Ltd. TX1010 xmitter with green slot for card.
Time passes and we find that the 
Audio Ltd. Skunk Works have been busy developing a new system. The Audio Ltd. 1010. The build on both transmitter and receiver are good. Solid metal - not plastic.

The Audio Ltd. 1010 is a digital wireless system, with an end-to-end latency of just two milliseconds. It covers 90 MHz of spectrum, from 470 MHz to 548 MHz or 518 MHz to 608 MHz, in banks, channels and fine tuned in 25 kHz steps to help you dodge the increasingly cluttered landscape, with a neat scanner in the receiver to help you find the empty spots. 

There is also a 594 MHz to 694 MHz range, but it will not be available in the US or Canada. One caution, a spot on a scanner may be empty one moment and quite busy the next. My only trivial complaint with the transmitter was that the battery clips are so "springy" that they would sometimes pop the batteries out when the door was open. 


Redding Audio's Scott Boland
When I mentioned that to Scott Boland at Redding Audio, distributors for Schoeps, Rycote, Voice Technologies, Cable Techniques, Peter Engh, Ambient Recording and Audio Ltd. in the USA, he reminded me that AA cells do vary in length, "Seems to be like the old 9V thing where Energizers and Duracell’s are a smidge different in length. I could get your alkalines that were left in the chamber when you returned the gear to pop out, but none of the other Lithium batteries I have here from all the pop brands did. It seemed that your battery + tip was a slice of a mm shorter."

The Audio Ltd. 1010 has been designed so that up to twenty systems can be operated within one TV channel. That, in itself, is somewhat remarkable. I was not sent enough systems to test this. Boland adds, "In the UK where their broadcast channels are 8 MHz wide, there's more room to fit more wireless. In the US we only have 6 MHz for a TV channel, so we can fit (15) 1010 systems in a US channel."


Audio Ltd. uses a proprietary codec to compress the audio and proprietary digital modulation scheme. It also provides selectable, four number encryption. Once the encryption is set at the transmitter, the receiver also needs to be manually set. The TX1010 transmitter, which comes with a snug neoprene case and mounting strap, runs on two AA batteries and can be set for 5 mW, 20 mW or 50 mW output. There's a ten step audio input gain control that ranges from 0 to -40dB. The high-pass filter can be set flat, 50Hz, 80Hz, 120Hz or 200Hz. Audio input is via a three-pin LEMO. I was told it's wired the same way as some Sennheiser three-pin LEMOS. The input will handle mic or line level signals and provides bias voltage for lavs and special bias for Schoeps CMR cables.

The data sheet says the transmitter can be operated up to five hours on two AA lithium batteries. I operated the transmitter at the highest output power, 50 mW, using Alkaline batteries and got two hours before the warning light began to blink and another twenty minutes before the transmitter shut down. Boland says, *Welcome to the world of digital wireless. Due to current drain, we don’t recommend Alkalines. When using any brand of digital wireless you must use NiMH as a minimum. Lithium are preferred. The reports back from the field so far is 4.5 hours with NiMH and anywhere from 5.5 to 7 hours with Lithium at 50 mW."

The OLEDs (Organic LED) are visible in the sun. The TX1010 display shows the block number and frequency simultaneously. You can easily switch between the US and EU block numbers.

The TX1010 has one feature guaranteed to catch the eye and ear of every sound location person. It records to a micro SD card in the transmitter, with "timecode capabilities", but I'm not exactly sure what those timecode capabilities are. If the signal doesn't make it to the receiver, you can pull the recording off the card in the transmitter. Brilliant! and a hat tip to Glenn Sanders at Zaxcom. (At present, there's a Zaxcom patent that may prevent the record feature from being enabled on any Audio Ltd. 1010 from sold in the USA.) That slot is also used for firmware updates.


No word yet on whether or not there are never-clip-like features in the wings for the 1010 although it does have a limiter, and the 1010 does not generate or transmit timecode. Engaging the limiter brought up the noise floor on the preproduction model I was sent, but I was also sent a - 9dB Sanken red band COS11 (for screaming opera singers and South American soccer announcers.) That meant I had to increase the sensitivity at the transmitter which brought up the noise floor. Enough so that when my soundie friend Bernie Ozol brought his bag out for a comparison, his Lectro Sm and SRb with a regular COS 11 were noticeably quieter. 

I reached out to Sanken, (Thanks, Sara at Plus24.net, actually) and she sent along another regular COS11 with a 3-pin Lemo to fit the Audio Ltd. 1010 transmitter. Once we got them lined up, the noise floor was identical in level. The spectra of the noise in the 1010 was a little higher in frequency; more of a "sssssss." The Lectro Sm was more "shhhhhh." Apart from that, both lavs were basically interchangeable for in terms of sound quality. 


DX1010 Receiver
Audio Ltd. DX101 Receiver
The DX1010 receiver is fully digital and is fully dual diversity with dual antennas and dual switching receivers. In addition, there is another layer of technology at work; Maximum Ratio Combining Diversity. So, in addition to choosing the stronger signal, the circuitry further amplifies the stronger signal and decreases gain on the weaker signal.

The Audio Ltd. DX1010 receiver also has digitally controlled front-end tracking filters. Its output can be switched from AES3 digital to line level analog. The analog output (+10 dBu max) can be reduced from 0 dB to -12dB, -24dB or -36dB as needed. 

Pressing and holding the outside two buttons flips the display which may be useful when bag mounting. The DX1010 receiver does not have a battery compartment. The receiver power spec is 6-18 V DC. Its outputs is a 25-pin D-sub Superset, Sound Devices, Panasonic/Ikegami adapter, with external DC input and audio output cables. 

The receiver displays the TX1010 transmitter battery status. You can scan the entire 100 MHz bandwidth of the unit or chop the scanner bandwidth into fourths to save time. The scanner continues to scan until you depress the central button on the three-button controls. There are a number of small LEDs on the DX1010 that must have something to do with the receiver; probably the dual diversity, but I didn't have documentation for them. 

IN USE
I had distance problems with reception at first with the 1010, but I write that off to how tricky the remaining spectrum can be in a metropolitan area; even in its suburbs. I remembered that a 300 kHz shift made all the difference when I was range testing the Audio Ltd. 2040. Eventually, my "standard walk test track", other wise known as a walk around the block in my neighborhood, equalled and exceeded the range I was getting with Bernie's 100mW Lectros, even though the 1010 transmitter was only putting out 50mW. As most experienced people will tell you, raw RF power may help you maintain a more solid workable RF field up close, but twice the power will not double your range. That's more the job of a well designed receiver and Audio Ltd. has a reputation for very well designed receivers.

Using the full 50 mW, I was able to get 130 yards in the clear, and with a hop over a neighbors solid wooden fence, out to 150 yards before the signal began breaking up.

I found one curiosity with the TX1010 transmitter. During my testing, we set it down on a folding chair and the audio began to misbehave. Under the padded seat of the chair was a sturdy metal pan bottom. It became apparent that the TX1010 transmitter does not like being placed on flat metal surfaces. Bernie's Lectrosonics SM worked fine on those same surfaces. 

REMOTE CONTROL
The TX1010 transmitter may be controlled wirelessly via Bluetooth, using the 1010TX app. I had problems at first with my iPad 3, but they were quickly solved with an update. After starting up the app, my iPad screen tells you its searching for transmitters. It will list them if Bluetooth is enabled in any TX1010 transmittersYou can name each transmitter with the app and that name is also transmitted to the receiver. You can put the transmitter in and out of standby to save battery power. You can also adjust transmitter input sensitivity and adjust the high-pass filter.

There were other icons in the menu bar of the 1010TX app. Some of them were active, but there was no explanation of their use or purpose. 

IN CONCLUSION
Audio Ltd. has been to enough rodeos with proven results. They understand how to make a product that is designed to work well. I think they've showed that with the 1010. It will be interesting to see how the firmware updates continue to evolve.

List price for the TX1010 transmitter is about $2,000 USD and $2,300 USD with the Voice Technologies VT500 omni wav. The DX1010 receiver is $2849 USD with adaptor.

Technique, Inc. © Copyright 2016 All Rights Reserved.
Contact Ty Ford at www.tyford.com

Please consider subscribing to the Ty Ford Audio/Video Blog.

Saturday, February 20, 2016

Radial JDV MK5 (VERY) Active Direct Box


Peter Janis
I have been a distant fan of Radial for years. I've never used any of their gear, but seeing it, reading about it and holding the occasional piece in my hands left me with one impression - very solid stuff. 

I saw the JDV MK5, read the cut sheet and asked Peter Janis if he'd forward one for this review. Peter was my "go to" guy when he was working with Gefell Microphones. I had heard that there was something special about the nickle-membraned Gefell M294, M295 and M296 condenser mics. Indeed there was. If you want to read that review, you can download it here.


Vintage imp-2
DIRECT BOXES
There are hundreds of them out there, ranging from my vintage Whirlwind imp-2 passive direct box, from the early 1970s, which consists of a couple of 1/4" jacks on one end, an XLR on the other and a small transformer inside. Direct boxes are used to convert a high impedance, unbalanced guitar or other instrument into a a low impedance, balanced mic signal. A transformer is used to correct the impedance mismatch. It also balances the line and sends it out as a three conductor connection; either on XLR or TRS. A balanced, low impedance mic level signal can run over longer lengths* (see notes at the end of this review). For the high impedance output of a guitar or keyboard, best practices says cables shouldn't be longer than twenty feet.

You still might run into problems even if you do stay within twenty feet. There are small mixers that say you can plug a high impedance instrument right into them. Yes, in some cases, but in other cases, the circuits are very unforgiving and the gain structure is wonky and you end up with "TCS", total crap sound!
Radial JDV Mk 5 front and back panels

Radial JDV MK
At $449, the Radial JDV MK5 is not passive nor is it your average active direct box. The 14-gauge steel used in the chassis and outer shell let you know this is just the tip of the iceberg.

The JDV MK5 has two channels, each with discrete, single-ended, Class A input circuitry, for electric or acoustic instruments.
It is decidedly not a stomp box unless you get  the JR-2 footswitch. 

Seen below, the two switches are for MUTE on the left and A/B select on the right. The JR-2 ($99) connects to the device using a standard balanced audio cable with choice of ¼" TRS or XLR connections. The JR-2 is unique in that it derives its power from the device being controlled which in turn illuminates the on-board LED indicators to show the remote.
Radial JR-2 Remote Control

According to Paul Blake, in the support department at Radial, these switches allow you to switch an instrument plugged into input one to either input A or input B, should you want to change the sound of your instrument for different parts of a song. The JDV MK5 would sit on an amp or somewhere nearby; close enough to plug in your instrument(s). You would not normally need to adjust anything on it during a performance.

The front/back image of the JDV MK5 above indicates that this is a busy box. There are two separate 1/4" TS unbalanced jacks, one for each input. Each input has its own input level control. Each channel also has a variable high-pass filter. The PHAZER knob and switch on the right allow you to time-align the two inputs. This would be for situations in which you had two pickups on the same instrument or a pickup and a strapped-on mic on the same instrument. The small switch below the knob lets you choose 0 to 180 degrees or 180 to 360 degrees. You then use the knob to align the two signals before the mono balanced XLR and other outputs. The other front panel adjustments are for compensating for different kinds of pickups. 

JDV MK5 Front Panel
Front Panel
Input A has a switch that changes the input impedance from 10 M Ohm for piezo systems to continuously variable DRAG for magnetic pickupsThe continuously variable resistive DRAG control allows you to compensate for the load from 22K Ohm to 500K Ohm for passive pickups. Input B can be switched from 10 M Ohms for piezos to 220 Ohms, typically for magnetic pickups

I have a K&K Pure Western Mini (now called a Pure Mini) piezoelectric passive pickup installed in my D28S Martin, thanks to the gentle and intelligent hands of John Thurston before he abandoned Baltimore for an obviously better way of life at Guitar Tex, in San Antonio, TX. This is a great pickup choice for that guitar, especially for finger-style playing, because there's little if any quack. 

The Pure Mini is three electronically paralleled piezo pickups mounted inside on the bridge plate. According to K&K, it wants to be plugged into a 1 Meg Ohm or higher input. Straight into my Fishman SoloAmp, it sounds better than I thought it would. I was curious about the Fishman SoloAmp 1/4" instrument input so I reached out to Derek Alves in the support department at Fishman. Alves confirmed that the input impedance of the 1/4" input is 5 Meg Ohm, so good to go for plugging straight in, but what about through the JDV MK5 and out its XLR to the Fishman SoloAmp?


I plugged the Martin into input A of the JDV MK5 and began to turn the drag control which requires a screw diver. The thought being that once you get it set, you don't want to accidentally change it. The D28S isn't as boomy as a regular D28, but it's still quite full. I found a position fully clockwise with the DRAG control - so, 500K Ohm, and about mid-point in the rotation with the high-pass filter that tucked in the bass a bit and the sound was more "finished", with a broader, flatter frequency responseAt this point I was coming out of the JDV MK5's XLR out and into the SoloAmp XLR input. Nice!  

I expected more of a difference with tonality when adjusting the DRAG and other impedance switches. With my guitars the effects were very subtle. Regardless, the difference was mostly about gain. Full clockwise (500K Ohms) on the DRAG control was best; YMMV with different pickups. 
Turns out, if you have piezo pickups, you should stick with the 10 M Ohm input positions on the JDV MK5. The DRAG control was designed more for magnetic pickups. 

The effect of the high-pass filters were more noticeable. None of my guitars, the Martin D28s, Fender Thinline with humbuckers or Martin Grand J28-LSE Baritone with active electronics ever got close to exceeding the input level and I had any guitar and JDV MK5 gains turned all the way up; so plenty of head room.

JDV MK5 Back Panel
AROUND BACK
The back of the JDV MK5 is no less busy. There's a four pin locking XLR to bring power to the unit from the external power supply. 

The next connection is a balanced 3-pin XLR fed from a Jensen JT-11-YMPC transformer, designed to feed a live sound board or recorder. 

The next four controls grouped together under the Radial logo offer some savvy help. The first one flips the polarity 180 degrees. The second one lifts the ground on pin 1 of the XLR output. The third one inserts a Jensen JT-11-YMPC transformer to isolate the XLR output signal path. These two may help you deal with your good friends Hum and Buzz. The fourth bumps the JDV MK5 output up to +20 line level. 

Continuing across the back panel are the jack for the footswitch that allows muting and switching between the two channels and an always-on 1/4" unbalanced, high-impedance out that can feed a tuner, amp or other device. There are two 1/4" unbalanced instrument inputs, one for each of the two inputs. There's a separate 1/4" unbalanced THRU output normally used to feed a stage amp and a separate 1/4" balanced TRS jack for microphone inputs. 

PHANTOM POWER
The 1/4" TRS microphone input jack is only routed through the input A. It has 48 V Phantom Power. According to Blake at Radial, "With phantom power, the two 6.8K ohm resistors limit the current to phantom powered devices to 10mA." That's more than enough for the hungriest condenser mic.

An LED under the DRAG control on the front panel lights when Phantom Power is active. As a safety precaution, the Phantom Power turns off when the JDV MK5 is powered down and has to be re-engaged by the small push switch in the side panel upon power up.

Both my Neumann TLM 103 (23 mV/Pa) and Audio-Technica AE5400 (10.0 mV/Pa) condenser mics overpowered the mic input when worked any closer than a foot, lighting the O/D lights on the front panel. Engaging the 10 dB pad on the AE5400 dropped the signal below clipping. I really like the Audio-Technica AE5400 for live vocals. I reviewed it back in 2003 when it came out. It uses one half the capsule of an AT4050 and has a 10 dB pad and high-pass filter. I'd put it up there with a Neumann KMS 104 and KMS 105. If all you have is high-sensitivity condensers with no on-board pads, I guess you could add a pad to the mic cable. My Shure SM86 (3.15 mV/Pa) hand-held condenser worked just fine with no pad, requiring the input trim to be about halfway up at 12 o'clock. My vintage dynamic Sennheiser MD421 (2.0 mV/Pa) also did well, also at about 12 o'clock. 

I was easily able to plug a mic into input A and my guitar into input B, control the levels with input trim and alter the frequency response with the separate high-pass filters. Everything sounded just fine at mic level going into my Fishman 220 SoloAmp. I could have also chosen the +20 output on the side of the JDV MK5 and gone line level for recording or to a FOH console. 


DEEP INSIDE
Drilling down a bit more into the guts of this beast. It's very common to use negative feedback in a circuit to improve fidelity. Negative feedback is not the only way to go, but it's a very common way. The Radial JDV MK5 does not use negative feedback and achieves its performance with single-ended Class A circuitry. Class A circuits are usually less efficient, generate more heat and exhibit better high frequency performance and fewer higher-order harmonic problems. Here's a great rabbit hole about amplifier modes.

Radial bought Jensen in mid 2014, so they now own one of the best makers of audio transformers in the business. Bill Whitlock, the former President, said Radial was their biggest client and in as much as he was turning 70, he wanted to ensure that Jensen's good name would continue. Quality transformers may not seem to be that essential, but they are a very big deal. 
A little bit of finely-crafted iron can really smooth the edges of your audio. 
 
John Hardy

John Hardy makes high-quality mic preamps, including one of my all time favorites, the Jensen Twin Servo, and knows quite a bit about Jensen transformers and circuit design. "Most traditional audio transformers use core material that is 97% iron. Most of the Jensen transformers use core material that is 80% nickel. I know that "iron" is a commonly used term when referring to transformers generically, but I like to make the distinction that the best transformers use the 80% nickel core material. Nickel is much more expensive than iron, but it performs better."  (and there we are, back at the magical properties of nickel. More about nickel here)

Being able to consistently and accurately turn out great transformers is very important. Hardy says. "Early Jensen transformers were wound by Reichenbach engineering. They were good, but Jensen is now winding in-house with more precise winders, so the piece to piece consistency is even better."

IN CONCLUSION
I found the JDV MK5 to be a very well-made and versatile piece of gear. It does a lot of different things and could be expected to become the hub of a performing musician's cluster of gear. The solo performer could use it to simply control one vocal and a mono instrument to one mono output, or other more complex configurations. Please continue to scroll below the specs for more information.


Addenda

2/20/16: Just before I returned the JDV MK5, I noticed a strange little noise on the ring out of notes on input B. I sent word and an audio file to Ryan Juchnowski, Custom Shop Manager / Trade Show / Radial Technical Support. He said this was unusual and would get back to me. Keep an eye on this space for an update!

3/1/2016: This is what they had to say; “We had engineering test a few of the units off the shelf and found that sometimes, when the signal LED begins to dim/discharge, that the strange noise becomes present. Luckily this is an easy fix and we have changed the resistor values in all new units so that this intermittent problem has been eliminated. Should users find that this issue is present in units which they already own, all they need to do is contact customerservice@radialeng.com and in typical Radial fashion, they will be taken care of immediately.”


JDV MK5 SPECIFICATIONS


SIDEBAR

Hold on a minute! There is documented evidence that even running long mic level signals back to FOH mixers also results in signal degradation. Fortunately, the JDV MK5 can also run +20 line level. 

Years ago, I spoke with John Hardy for a review in MIX magazine. He recounted events at which Randy Ezratty's Effanel remote recording rig was used to record major concerts. They found that they got a better signal in the truck if racks of mic preamps were put on stage. Makes sense, right? Shorter mic to preamp runs sounded better than long mic runs. (Yes, they had to have an extra tech stage-side to oversee the mic pre levels.) The take away lesson was that if you're running long lines, it's better to have them at line level than mic level. 

Even if you do this in live sound, your mixer and speakers may not be good enough to let you hear the difference. I walked into a singer-songwriter event here in Baltimore one night and noticed an AKG C1000S set up for acoustic guitar. I thought the sound would surely suck, but to my great surprise it didn't!

I'm guessing that the PA company owner hadn't had his C1000S modified. It must have been the compromises of the PA system that scraped the edge off of the C1000S. If you have one, try it in the studio and for live PA and see for yourself. If you have an AKG C1000S and are in search of a mod, try Mark Fouxman at Samar Audio. Last time I checked, he was charging $169 USD for the mod. 

Hey, please subscribe to this blog. There are links up top on the right side for that. If you have questions......ASK!

Technique, Inc. © Copyright 2016 
Reach Ty Ford at www.tyford.com